
Step 1: Sign Up for Zapier
- Visit Zapier: Go to Zapier’s website.
- Create an Account: If you don’t have an account, sign up by clicking on “Sign Up” and following the instructions. If you already have an account, log in.
Using KW Command?
To speed up the process, try using our template here:
KW Command”>RateMyOpenHouse.com -> KW Command
Step 2: Set Up and Train Your Email Parser Account
- Go to Email Parser: Visit Zapier Email Parser.
- Log In: Use your Zapier account login credentials to log in to the Email Parser.
- Create a Mailbox: Click on “Create Mailbox” or visit Zapier Email Parser Mailboxes to set up a new parser mailbox. You will be provided with a unique email address (e.g.,
parser@robot.zapier.com).
- Train the Parser:
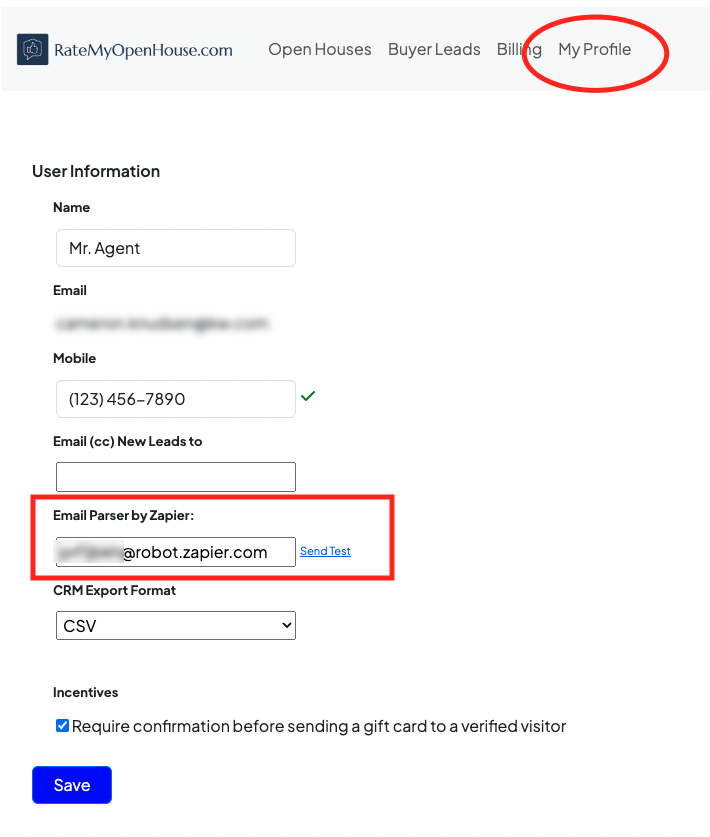
- Send a Test Email: Login to your RateMyOpenHouse.com account, visit “My Profile”, and paste the email in the “Email Parser by Zapier:” box, then click “Save”.
- Send a Test: Inside “My Profile” on your RateMyOpenHouse.com account, click “Send Test”. You will also be CC’d on this test email to ensure it went through.
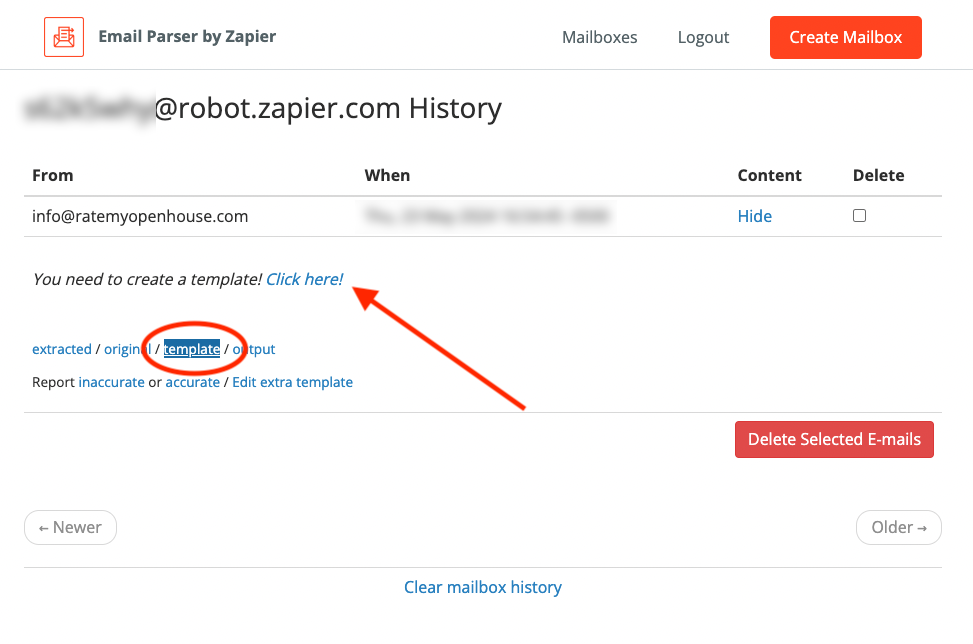
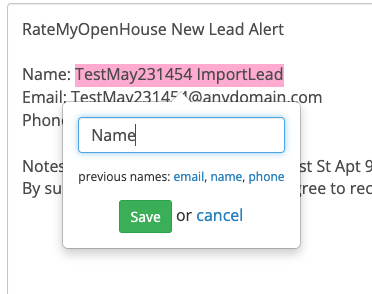
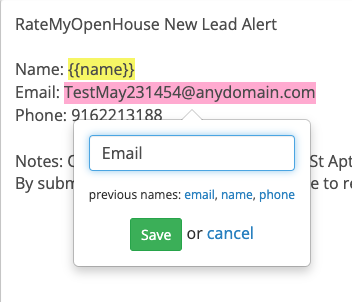
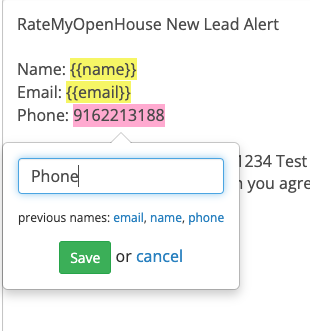
- Set Up Template: An email will be sent to the parser. Go back to the settings for the new mailbox and highlight the information you want to extract. Assign names to the fields you highlight to create your parsing template (e.g., Name, Email, Phone Number).
- Save the Template: Once you have highlighted all necessary fields and named them, save the template. This will train the Email Parser to extract data from similar emails.
Step 3: Create a New Zap
- Navigate to the Zapier Dashboard: Go back to the Zapier Dashboard, click on “Make a Zap” in the top menu.
- Name Your Zap: Give your Zap a meaningful name, such as “RateMyOpenHouse.com to [Your CRM Name]”.
Step 4: Set Up the Email Parser Trigger
- Choose Trigger App: Search for and select “Email Parser by Zapier” as the trigger app.
- Set Up Trigger Event: Choose “New Email” as the trigger event.
- Connect Email Parser: If you haven’t already, follow the on-screen instructions to connect your Email Parser account.
- Select a Mailbox: Choose the mailbox you created and trained in the previous step.
Step 6: Set Up the Action
- Choose Action App: Search for and select your system’s app (e.g., Keller Williams Command).
- Select Action Event: Choose the appropriate action event, such as “Create Contact or Lead”.
- Connect Your System: If this is your first time using your system with Zapier, you will need to connect your account by entering the necessary API credentials or following the OAuth process.
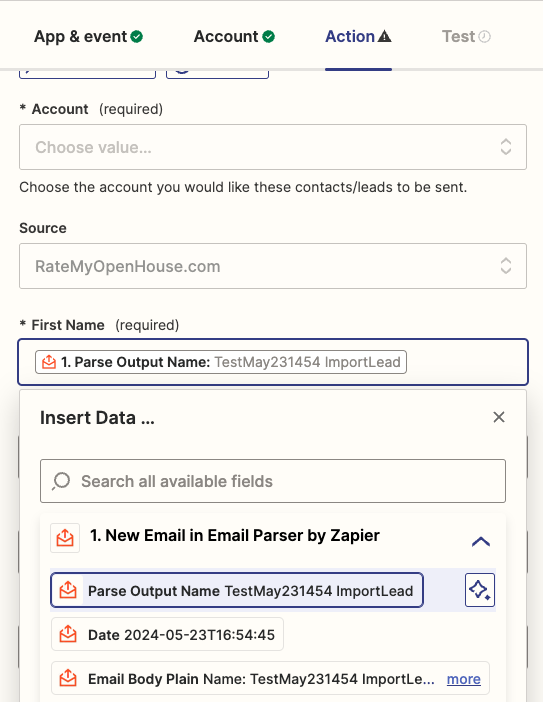
- Map the Data: Map the parsed data fields from the email to the corresponding fields in your system. Zapier will display the fields from your email parser and allow you to match them with the fields in your system.
- We recommend filling out as many boxes as possible including
- Source: Open House
- Tags: Open House Lead, RateMyOpenHouse.com
- Notes: Email Body
- We recommend filling out as many boxes as possible including
Step 7: Test Your Zap
- Run a Test: Zapier will prompt you to run a test to ensure everything is working correctly. Follow the instructions to complete the test.
- Review the Results: Check the test results to confirm that the data was parsed and sent to your system accurately.
Step 8: Turn On Your Zap
- Activate the Zap: Once you’re satisfied with the test results, turn on your Zap by clicking the “Turn on Zap” button.
- Monitor and Maintain: Monitor the integration initially to ensure it runs smoothly. Adjust the parsing template or field mappings as needed.
Set Up for Success
Now that you have your RateMyOpenHouse.com account connected to your favorite CRM, any new lead captured by your open house forms will be automatically routed to your connected account. 🎉
Troubleshooting Tips
- Parsing Issues: If the Email Parser is not extracting the data correctly, review the parsing template and adjust the highlighted fields.
- Connection Problems: Ensure your system’s API credentials are correct and that your system is properly connected to Zapier.
- Data Mapping: Double-check the field mappings to ensure data is sent to the correct fields in your system.


